Settling Your RV in for the Winter
The weather is cooling off, schools are back in session, and your PTO needs some time to recharge. The blissful months of summer have to come to an end eventually, and when it’s time to return to the old routine, you should make sure your RV is ready for downtime.
An RV provides an unmatchable outdoor experience. You have the perfect blend of the immersive, toes-in-the-dirt feeling of classic camping with the comfort of having an enclosed place to rest and sleep, away from bugs, wildlife, and the elements. Giving your RV the proper care is essential for prolonging its lifetime, and properly preparing your RV for long-term storage can make a world of difference.
What Happens If You Don’t Winterize Your RV?
Freezing pipes and tanks can be disastrous if your RV is not correctly winterized. When the temperatures dip below freezing, water expands and can put pressure on the internal systems of your RV, potentially causing them to burst. With such an investment as an RV, you need to give it the right care to avoid expensive repairs.
Even if you live in a warmer climate, winterizing an RV isn’t a bad idea if you know it’s going to be sitting for an extended period of time. It’s also good for the sake of regular maintenance and upkeep. Plus, should a cold front come through, you won’t have to rush to get it ready to withstand the frigid conditions.
When Is It Time To Winterize Your RV?
Pay attention to your area’s regular weather patterns. If you’re approaching your first winter in a new state, ask a local friend or coworker what to expect.
A key indicator that it’s time to winterize your RV is when the temperature is going to be near or below freezing for longer than 24 hours. But remember, it’s always better to be safe than sorry. If you’re asking yourself, “Should I winterize my RV?” the answer is probably going to be “yes.”
How To Winterize an RV
Many RV dealerships offer winterizing and de-winterizing services, but knowing how to winterize your RV yourself can save you money. You’ll also get to know the inner workings of your RV, which can be an essential knowledge base should you ever encounter a problem with your RV while you’re away from civilization.
You don’t have to be a maintenance expert to do your own RV winterization, either. It can be done in a few easy steps with only a handful of tools and supplies.
How Long Does It Take To Winterize an RV?
The first time you’re winterizing your RV can take a couple of hours. With practice and the right tools on hand, you can winterize your RV in 30 to 45 minutes.
Tools and Supplies To Winterize an RV
In order to properly winterize your RV, these are the tools and supplies needed to winterize your RV:
- Flashlight
- 2-3 gallons of nontoxic RV antifreeze
- Water heater bypass kit (if your RV is not already equipped with one)
- Water pump converter kit
- Tank-cleaning wand
- External flushing system (if needed)
- Air compressor and adaptor (if using the compressed air method)
Step 0: Choose Your Method—Antifreeze vs. Compressed Air Method
There are two popular methods for winterizing an RV, and both have advantages and drawbacks. It’s up to you which method you ultimately choose. The antifreeze method uses more antifreeze, which is more expensive and can leave a lingering taste after you de-winterize your RV, but it’s more effective and is especially well suited for RVs staying in a colder climate.
Alternatively, the compressed air method is more environmentally and budget-friendly, but blowing air into your RV’s system increases the risk of contamination. If not done properly, water can still collect in low points of your RV’s systems and therefore still pose a risk of cracking your pipes.
Regardless of which method you choose, you will still need antifreeze, so be sure to pick some up before the stored sell out.
Step 1: Clean Your RV
Get ready to use some elbow grease. When the temperatures drop, pests get cold, and your unattended RV starts to look especially comfortable for them. Always refer to your instruction manual first for specific measures, but you’ll want to make your RV as uninviting as possible.
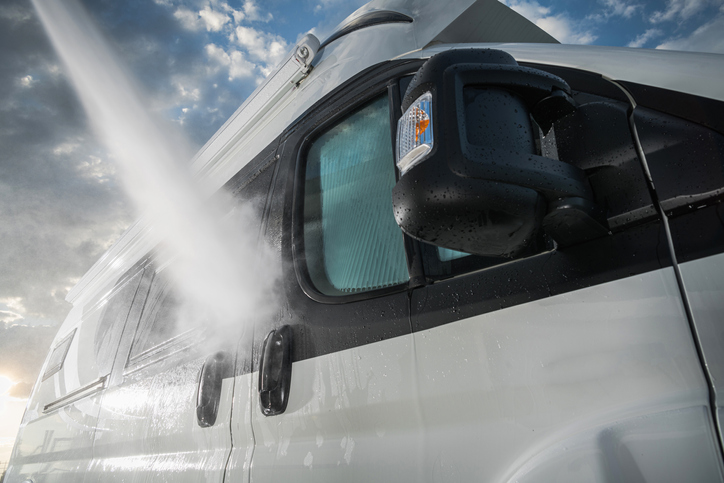
Eliminate all traces of food and water from your RV, wipe down all surfaces, sweep, mop, vacuum, and remove bedding and linens to thoroughly wash and store them. Clean and seal both sides of windows, doors, and any cracks or small openings you find. Give the exterior of your RV a good wash as well, including the roof and undercarriage.
Step 2: Drain All Tanks and Systems
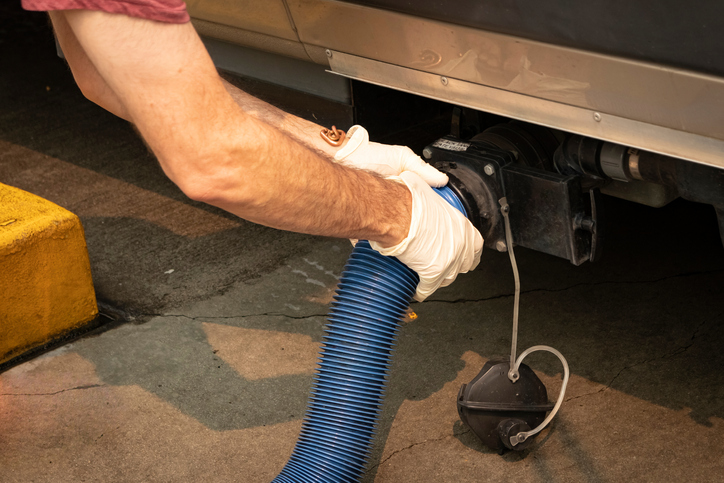
Gray and Black Tanks
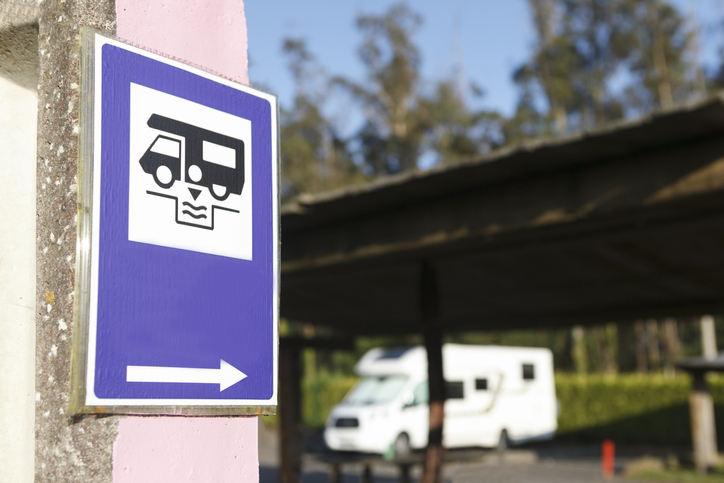
Locate a dump station. Many Rjourney RV Resorts have dump stations available.
First, remove water line filters and take this opportunity to inspect them. Decide if replacements are needed, and if so, add them to your list.
Then open up and let it all out. Disconnect and drain your freshwater tank, then empty your black and gray tanks. Leave the hose connected for longer than you might usually to ensure everything comes out, then give the tanks a good flush. If your RV doesn’t have a built-in flushing system, use a cleaning wand and an external flushing system.
Water Heater
Turn off your water heater and let it completely cool before attempting to drain and verify that the pressurized system is turned off as well. Once cool, open the pressure relief valve, remove the anode rod, or drain plug, and stand back as the water may come pouring out rather quickly.
While you’re waiting, check the quality of your anode rod to see if it also needs replacing. You can also clean your hot water tank with a vinegar solution or a rinsing wand. If using the antifreeze winterizing method, replace the rod or drain plug once the tank is empty. If you’re using the blowout method with compressed air for RV winterization, do not replace the rod or drain plug yet.
Interior Lines
Next, open all faucets both hot and cold, and remove all drain plugs inside and outside of your RV. Don’t forget the shower or toilet.
Locate low-point water drains and open them. Turn on your water pump and let it completely force out any remaining water, but only allow it to run for a few seconds, as running the pump with such low water pressure can cause damage.
At this point, all sources of water should be effectively emptied. Close the faucets once again.
Step 3: Bypassing the Water Heater and Freshwater Tank
Before proceeding with any further steps, you want to close all valves and bypass the water heater and freshwater tanks. Your RV may already have bypass kits installed, so refer to the owner’s manual if you’re unsure.
Water Heater
If your RV has a kit already installed, follow the instructions and the diagram in the owner’s manual for how to locate and operate it. If there is no kit, you can purchase one and attach it fairly easily. This bypass prevents you from wasting antifreeze.
Freshwater Tank
Once again, refer to your manual to see if your RV already has a winterization valve installed. If so, turn it to the correct position according to the manual’s instructions.
If a valve is not installed, you can purchase a water pump converter kit to install yourself.
Regardless, the end of the system will need to be connected to an antifreeze jug.
Step 4 (Antifreeze Method): Flush Your Systems With Antifreeze
Once both tanks have been successfully bypassed, turn on your water pump once again. It will draw antifreeze into your RV’s lines from the connected source. Then, one at a time, open every faucet in your RV, hot and cold. Wait until the pink antifreeze comes through, then turn off the faucet. This also applies to the toilet, which you should flush until you see pink. If the connected bottle runs out, connect another.
Using another bottle, pour antifreeze down every drain, roughly one cup for every drain. The toilet needs at least two cups, which can then be flushed. From both the toilet and sink drains, both the gray and black tanks should receive enough antifreeze to make it through the winter. Turn off the water pump when finished.
Step 5 (Compressed Air Method):
Grab a friend or family member if you want to speed this process along. Instead of filling your lines with antifreeze, you’ll use an air compressor set to 30 or 40 psi to rid the system of any traces of water. For the water heater, don’t replace the anode rod or drain plug, and be sure to close the hot water heater’s pressure relief valve.
First, attach the blowout plug and pump the hot water lines. Reinstall the anode rod, or drain plug, with plumber’s tape. Then turn on the bypass, run all faucets on “warm” until they run dry, and then connect the air compressor to the water inlet to pump air throughout the interior lines.
This is when a second person will come in handy. Verify that the water pump is turned off and low-point drains are open. Send one person inside to make sure every faucet is turned off before turning each faucet on one at a time, both hot and cold. The other person will blow the air, and the person inside will alert when water no longer blows through before proceeding to the next. Work your way from the closest faucet to the outdoor plug to the farthest.
After every faucet has been blown, hold the toilet valve until water has completely cleared. At this point, your RV’s system should be good and dry. You will still want to pour antifreeze down every drain to protect P-traps, so while this method is not entirely antifreeze-free, it uses quite a bit less.
Step 6: Prepare Your Engine, Battery, and Exterior

Now that your RV’s systems should be good to go into the cold of winter, you can check on the other components of your RV. Top off the engine oil, transmission fluid, coolant, and wiper fluids as needed. You can also add some fuel stabilizer before filling the tank, then run the engine for five minutes to let the stabilizer work through.
Disconnect and store the battery in a warm, dry location, always starting with the negative side first. Get the oil changed on the engine and the generator, and check the air filters and replace if necessary.
You can also protect the exterior of your RV by purchasing covers for the whole vehicle and the wheels.
Step 7: Plan for Your Next Trip To Stay at an Rjourney RV Resort
Don’t let the end-of-summer blues get you down. Now that you know how to winterize an RV, give yourself something to look forward to and start making plans for your next big RV adventure. Rjourney RV resorts can be found in states all across the country near some of the most beloved destinations.
Our resorts are designed specifically for RV camping and are loaded with features to benefit you and your RV, such as dump stations, laundry facilities, on-site convenience stores, and plenty more. Many resorts also have options for tent-pitching and cabin-living, if that’s the way you want to stay.
Find the Rjourney RV Resort near your next adventure and reserve your spot today!