Two things ruin camping meals. Warm coolers and uninvited guests.
A cooler that can’t hold temperature turns your steaks into a biology experiment by day 2. A raccoon (or worse) that finds your food stash turns your campsite into a crime scene by night 1.
Both problems share the same fix: keep food cold, keep it sealed, and keep it stored where wildlife can’t reach it. Here’s the system.
The Cooler Strategy
Your cooler is the most important piece of food storage equipment you own, and most people use theirs wrong.
Pre-chill everything
The number one cooler mistake is loading warm food into ice and hoping. Ice maintains cold. It can’t create it.
Pre-chill your cooler 12 to 24 hours before loading. Toss a bag of sacrificial ice in the night before, let it cool the walls and insulation, then dump the melt water and load your food. Everything going into the cooler should already be cold. Refrigerator-cold. If meat is frozen, even better; it acts as its own ice pack as it thaws.
Ice management
Block ice lasts longer than cubed ice. The physics are simple: less surface area per unit of volume means slower melting. Freeze water in large containers (milk jugs, 2-liter bottles, rectangular Tupperware) before the trip. Mix some block ice with cubed ice. The blocks hold base temperature while the cubes fill gaps and cool drinks faster.
Drain vs. don’t drain. This is the great cooler debate. Cold water from melted ice helps maintain temperature because water transfers cold more efficiently than air. Leave the drain plug closed unless you need to keep dry goods dry (and those should be in waterproof containers anyway).
Ratio. Aim for a 2:1 ice-to-food ratio on trips longer than 2 days. Yes, that means less food fits. Plan accordingly and pack denser, calorie-rich foods that take less space.
Two-cooler system
If you’re camping more than 2 nights, use 2 coolers. One for drinks (opened 30 times a day, temperature fluctuates constantly). One for food (opened only at meal prep, stays sealed otherwise). The drink cooler can be cheap. The food cooler should be the best you can afford.
Every time you open a cooler lid, warm air rushes in and your ice pays the price. A drink cooler that gets opened 30 times in an afternoon can lose 3 to 5 pounds of ice to melting. Keep that damage away from your food supply.
Where to park your cooler
Shade, shade, shade. Direct sun on a cooler lid can raise interior temperature by 10 to 15 degrees in an hour. If your campsite doesn’t have natural shade, drape a wet towel over the cooler lid. Evaporative cooling buys you real temperature margin. Move the cooler as shade shifts during the day.
Elevate the cooler off hot ground on a picnic table, a board, or a cooler stand. Asphalt and bare ground radiate heat upward. Even 6 inches of air gap helps.
Food Organization
Pack in meal order
Think of your cooler as a stack. The last meal you’ll cook goes in first (bottom). The first meal goes in last (top). You shouldn’t be digging through 3 days of food to find tonight’s dinner.
Day 1 on top: Fresh items, things that don’t need to stay frozen. Day 2 in the middle: Items that can thaw slowly from frozen. Day 3 on the bottom: Frozen proteins that will thaw naturally by the time you need them.
Contain everything
Raw meat goes in sealed ziplock bags inside a secondary container (a small plastic bin works). Double-bagging prevents leaks, and the container keeps raw juices away from other food. The flavor issue matters, and the safety issue matters more: cross-contamination from raw chicken at a campsite where you’re cutting vegetables on the same picnic table is a real food safety risk.
Condiments, cheese, deli meats, and other small items go in a clear plastic organizer bin. Without one, you end up emptying half the cooler to find the mustard. Clear bins let you see what’s where without opening and rummaging.
Non-perishable backup shelf
Keep a separate dry-goods box outside the cooler entirely. This is your weather-independent, ice-independent backup:
Peanut butter. Tortillas (they last days unrefrigerated). Oats. Dried fruit. Nuts. Crackers. Canned beans or chili. Olive oil. Salt, pepper, spices in small containers. Hot sauce.
If your cooler fails, your trip doesn’t. That box feeds you for 2 to 3 days without refrigeration.
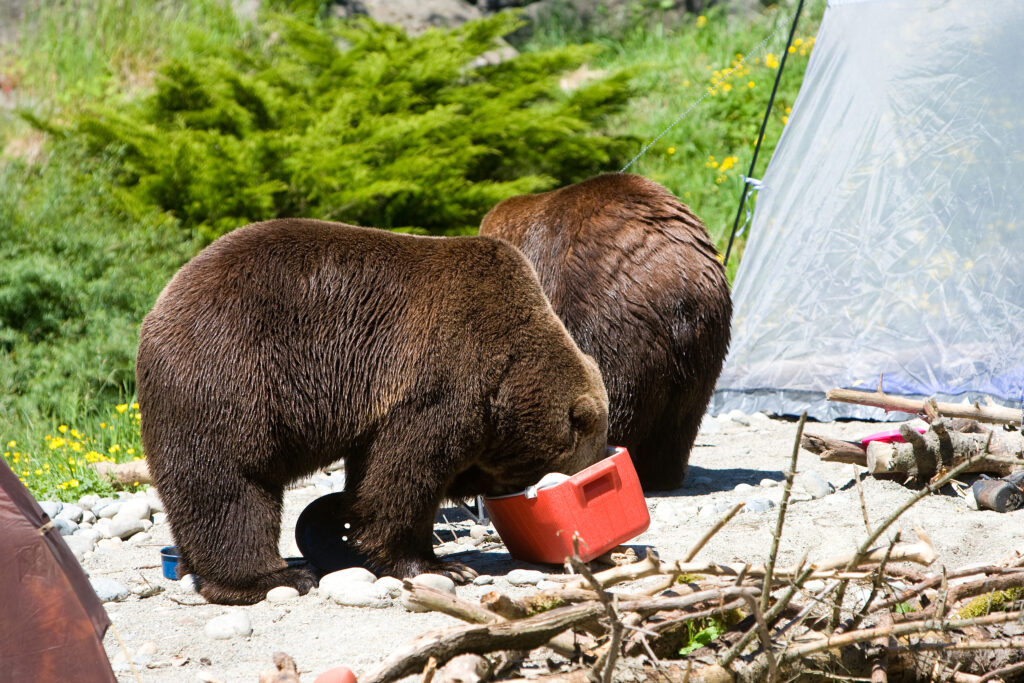
Wildlife-Proofing Your Food
The scent problem
Animals don’t find your food by sight. They find it by smell. A bear can detect food scents from over a mile away. Raccoons, far less dramatic and far more persistent, can smell an open chip bag from across a campground.
Everything that smells goes into sealed storage at night and whenever you leave your campsite. That includes coolers, cooking equipment, trash, empty cans, used dish sponges, and the clothes you cooked in (grease spatter smells like dinner to a raccoon).
Bear country rules
If you’re camping in bear territory, food storage rules are posted, regulated, and enforced. RJourney parks in real bear country include Tunatua RV Resort in northwest Colorado (a basecamp for elk hunters near Craig), Laramie RV Resort on Wyoming’s Snowy Range corridor, Klamath Falls RV Resort an hour south of Crater Lake, Dixie Forest RV Resort in Panguitch (gateway to Bryce and Zion), and Kenanna RV Resort on the Washington coast. Different black bear populations, same protocols.
Bear boxes. Many campgrounds in bear country provide metal food storage lockers at each site. Use them. Everything that has a scent goes in: coolers, dry goods, toiletries (yes, bears investigate toothpaste), and trash. If your campground doesn’t have bear boxes, ask staff about their food storage policy at check-in.
Bear canisters. Required in some backcountry areas. Worth knowing about if you’re day-hiking from your campsite, even when your site itself has a bear box.
Never store food in your tent. This should be obvious, and bears don’t knock. A bear that associates tents with food becomes a problem bear, and problem bears often end up euthanized. Keeping food out of tents protects you and protects the bear. For more on what’s actually out there, see our guide to black bears and camper safety.
Raccoon-proofing (the more common threat)
Be honest with yourself: most campground food raids come from raccoons. Bears get the headlines. Raccoons do the work. They’re smart, persistent, dexterous (they can open cooler latches, unzip soft coolers, and pry open containers that aren’t truly sealed), and they hunt in groups. If you want the full picture, see our guide on whether raccoons are dangerous to campers.
Latching coolers with positive-lock mechanisms are essential. A lid that lifts open without unlatching will get opened by 2 AM.
Bungee cords over cooler lids work as a secondary deterrent, and they aren’t enough on their own. Raccoons will work a bungee for 20 minutes and eventually win.
Store coolers in your vehicle at night if you don’t have bear boxes. Locked car, windows up. This is the simplest, most reliable protection against raccoons, skunks, opossums, and the occasional bold coyote (more on those in our coyote safety guide).
Clean your cooking area thoroughly. Wipe down the picnic table. Wash dishes and drain the sink before bed. Pick up any dropped food. A raccoon will visit a clean campsite once and leave. A site with food traces gets visited every night of your trip.
Safe Cooking Temperatures
A campsite doesn’t have a kitchen thermometer conveniently hanging on the wall, and food safety standards don’t change because you’re outdoors.
Pack an instant-read meat thermometer. They cost about $10 and weigh nothing. They’re the difference between “is this chicken done?” and knowing for certain.
Minimum internal temperatures. Ground beef 160°F, chicken (all cuts) 165°F, pork 145°F, fish 145°F. These are the USDA thresholds for killing common foodborne pathogens. Treat them as floors. Cooking past them is fine; cooking under them is the trip everyone remembers for the wrong reason.
The 2-hour rule. Perishable food left in the danger zone (40°F to 140°F) for more than 2 hours should be discarded. On days above 90°F, that window shrinks to 1 hour. At a campsite in July, that means getting cooked food eaten or back into the cooler quickly.
Wash hands before cooking. Campground spigots and biodegradable soap work fine. Use hand sanitizer when you can’t get to soap and water. If you’ve been handling firewood, fishing, or exploring, wash before you touch food.
Packing List for Camp Food Storage
Here’s what to bring beyond the food itself:
Cooler gear: Block ice (frozen in advance), ice packs as backup, drain plug (check it’s sealed), wet towel for lid cooling, bungee cord for wildlife security.
Organization: Clear plastic bins for cooler organization, gallon zip-lock bags (bring more than you think), dry goods box with lid, small cutting board, instant-read thermometer.
Cleanup: Biodegradable soap, sponge, small basin for dishwashing, trash bags (double-bag to contain odors), paper towels.
Wildlife: Bear spray if in bear country, headlamp for nighttime cleanup (so you can see what you’re doing and spot any visitors), the campground’s specific food storage requirements (read at check-in or call ahead).
Frequently Asked Questions
How do you keep food cold for 3 days camping?
Pre-chill your cooler and all food before loading. Use block ice mixed with cubed ice at a 2:1 ice-to-food ratio. Keep the cooler in shade at all times, open it as little as possible, and use a 2-cooler system (one for drinks, one for food). A quality hard-sided cooler with 2+ inches of insulation, properly pre-chilled and loaded, will hold food-safe temperatures for 3 to 5 days.
What food doesn’t need refrigeration for camping?
Peanut butter, tortillas, bread, oats, granola, dried fruit, nuts, canned beans and chili, canned tuna, hard cheeses (cheddar and parmesan last 2 to 3 days unrefrigerated if sealed), apples, oranges, crackers, and shelf-stable milk. Build a separate dry-goods box with these items as your cooler-independent backup.
How do I keep animals out of my food while camping?
Store all scented items (food, coolers, trash, toiletries) in bear boxes if available, or locked in your vehicle at night. Use latching coolers with positive-lock mechanisms. Clean your cooking area and picnic table before bed. Never store food in your tent. In bear country, follow posted regulations exactly; they exist to protect both you and the wildlife.
Should I drain water from my camping cooler?
Generally, no. Cold melt water helps maintain cooler temperature because water transfers cold more efficiently than air. Only drain if you need to keep specific items dry, and in that case, put those items in waterproof containers rather than draining the whole cooler. If you do drain, replace the water volume with fresh ice immediately.
Plan the Trip
This system works the same wherever you camp. It just gets stress-tested harder in places where the wildlife outnumbers the people. If that’s the trip you’re planning, find an RJourney park and check availability.